
How a Brand Can Get Started with Placements in Brand Control Center (BCC)
Placements help brands manage video content centrally and deploy it seamlessly across multiple touchpoints, without creating multiple embeds for each page or context.
Key Benefits
- One-time setup, multi-location deployment: Create a single placement and use it across homepage, PLPs (Product Listing Pages), search pages, or apps.
- Contextual content delivery: Show the most relevant videos based on page context, categories, journeys, or keywords.
- Structured content grouping: Organize videos using styles and sections for clarity and consistency.
- Faster integrations: Reduce engineering effort with a single Placement ID instead of multiple embeds.
- Preview-first confidence: Validate layout, sections, and personalization before publishing.
- Scalable for future needs: Supports dynamic and generative sections for real-time content updates.
Step-by-Step Guide: How to Create and Use a Placement
Step 1: Navigate to Placements in BCC
Go to Grow > Onsite > Placements in the Brand Control Center.
You’ll see:
- A list of existing placements (most recent first)
- Placement status (active/inactive)
- Quick actions: Edit, Duplicate, Copy Placement ID, View Analytics, Delete

Step 2: Create a Placement – Define Styles
Click Create Placement to begin with Styles.
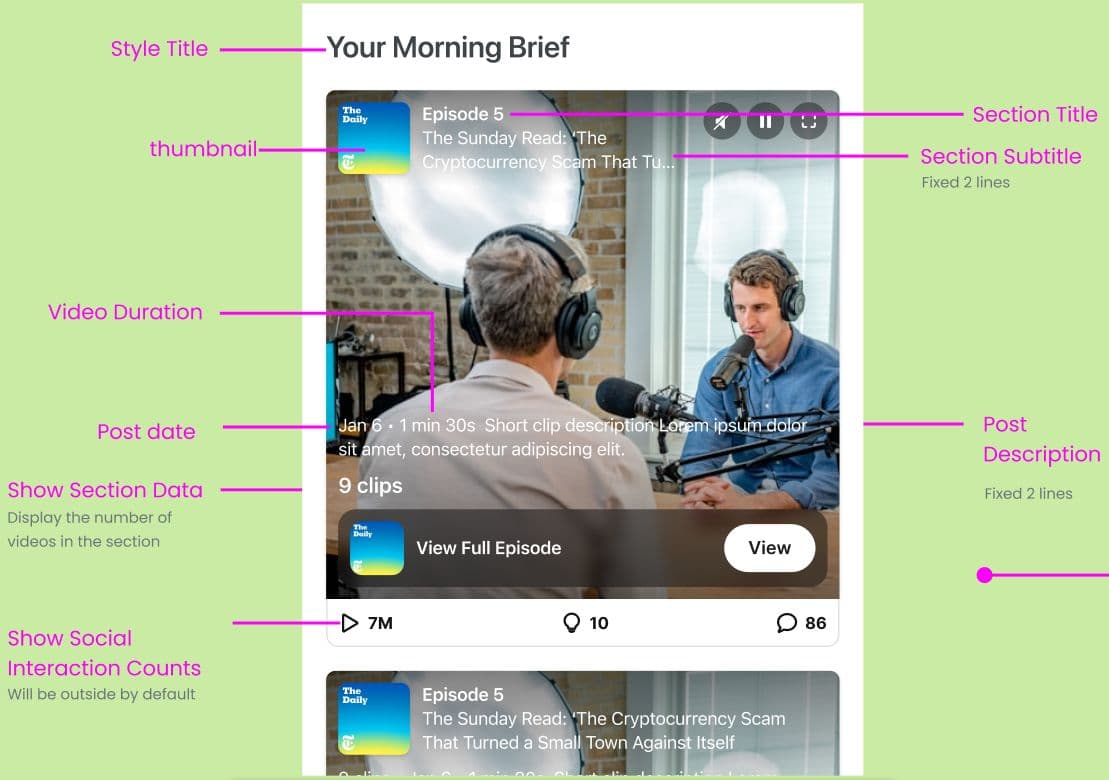
What is a Style?A style defines how content is grouped and personalized within a placement.
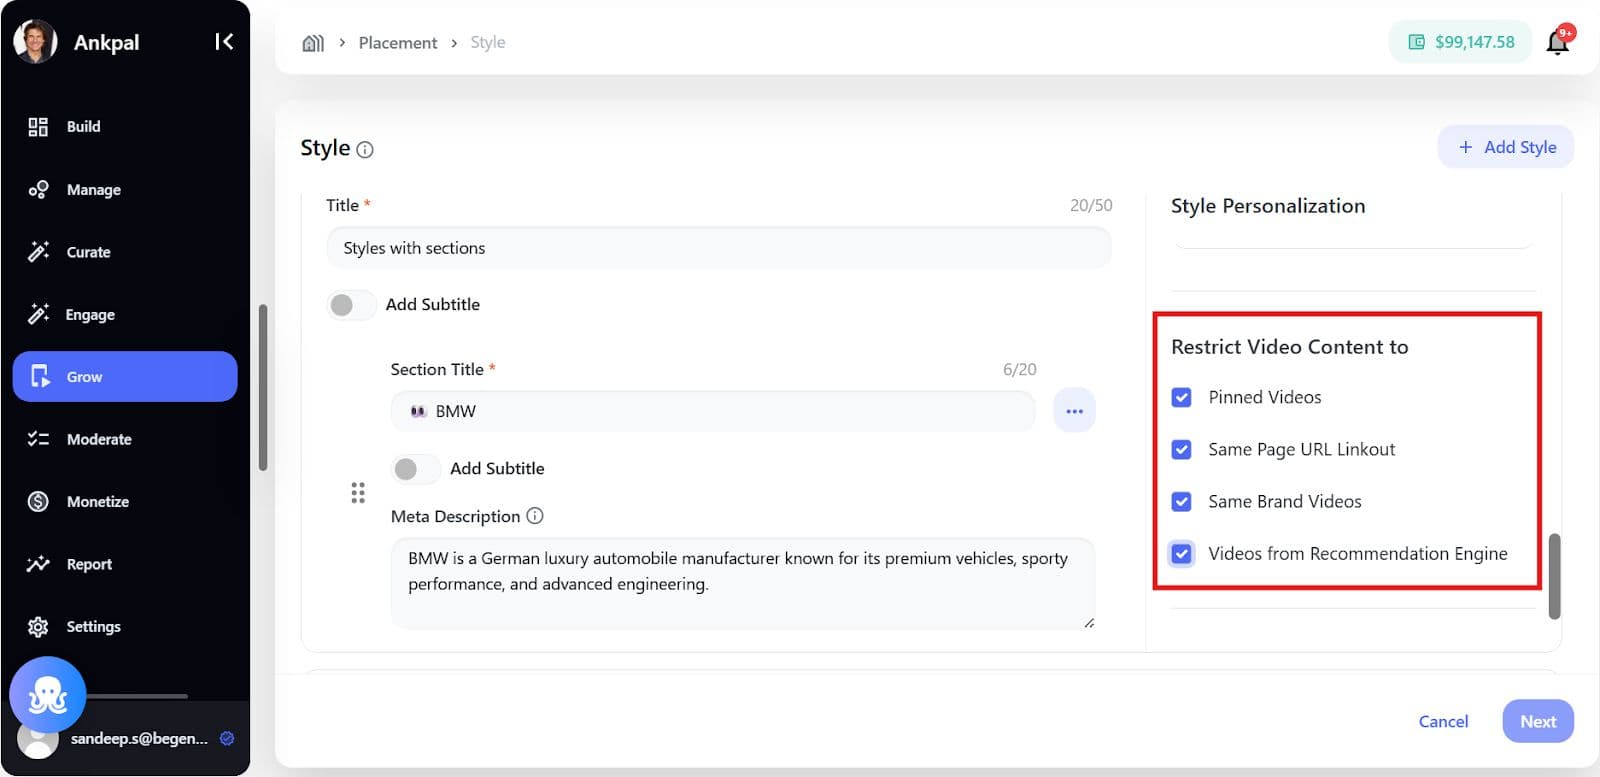
Configure Style
- Add a Style Title (mandatory)
- Optionally add a subtitle
- Add up to 10 sections under a style
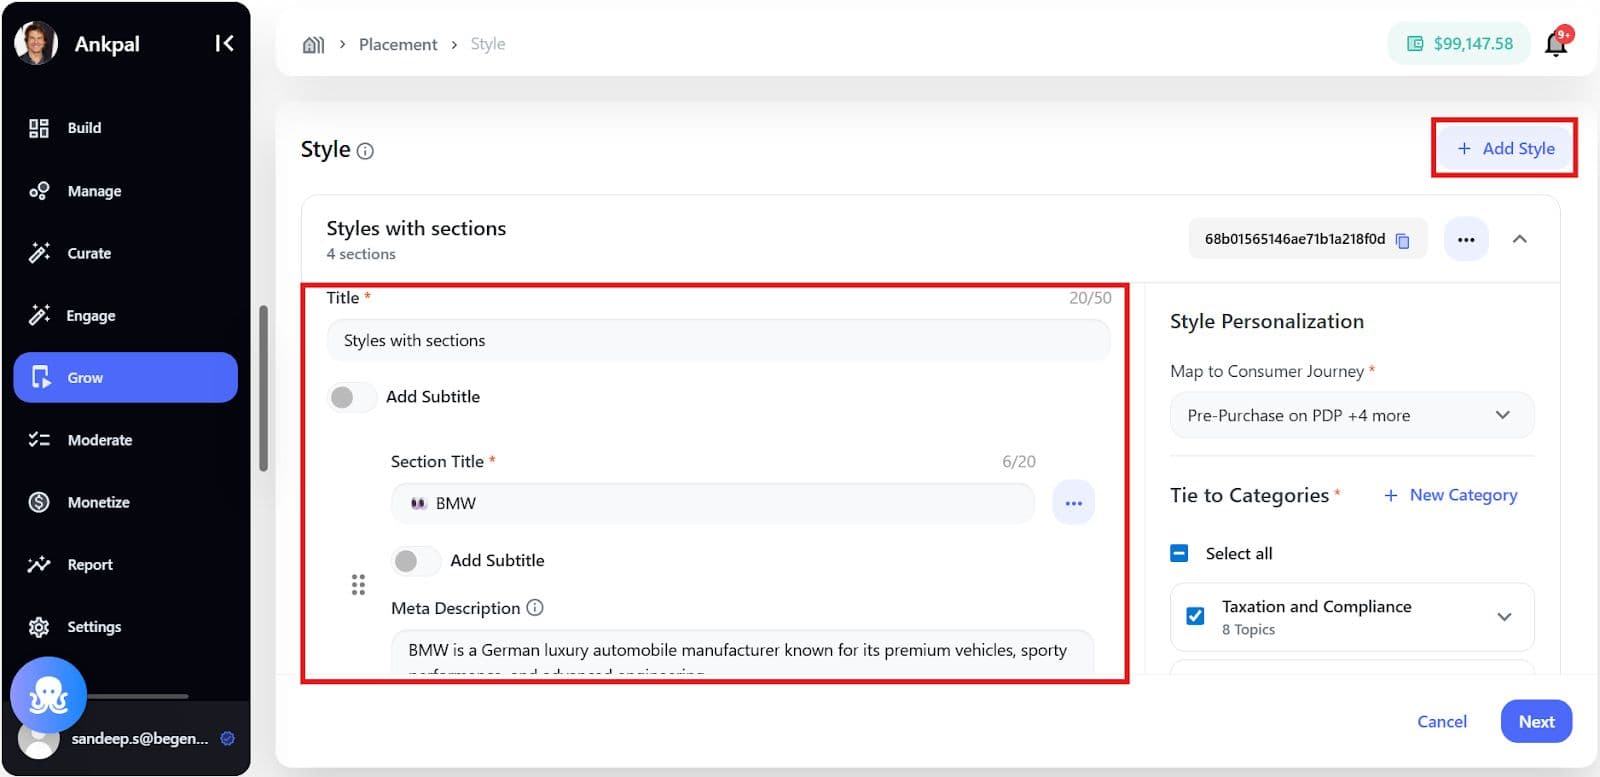
Step 3: Add Sections
Sections allow you to group videos logically (e.g., Featured, Trending, How-To).
For each section:
- Add Section Title (mandatory)
- Add meta description (optional)
- Reorder sections using drag-and-drop
Sections are optional - placements can also work without sections.
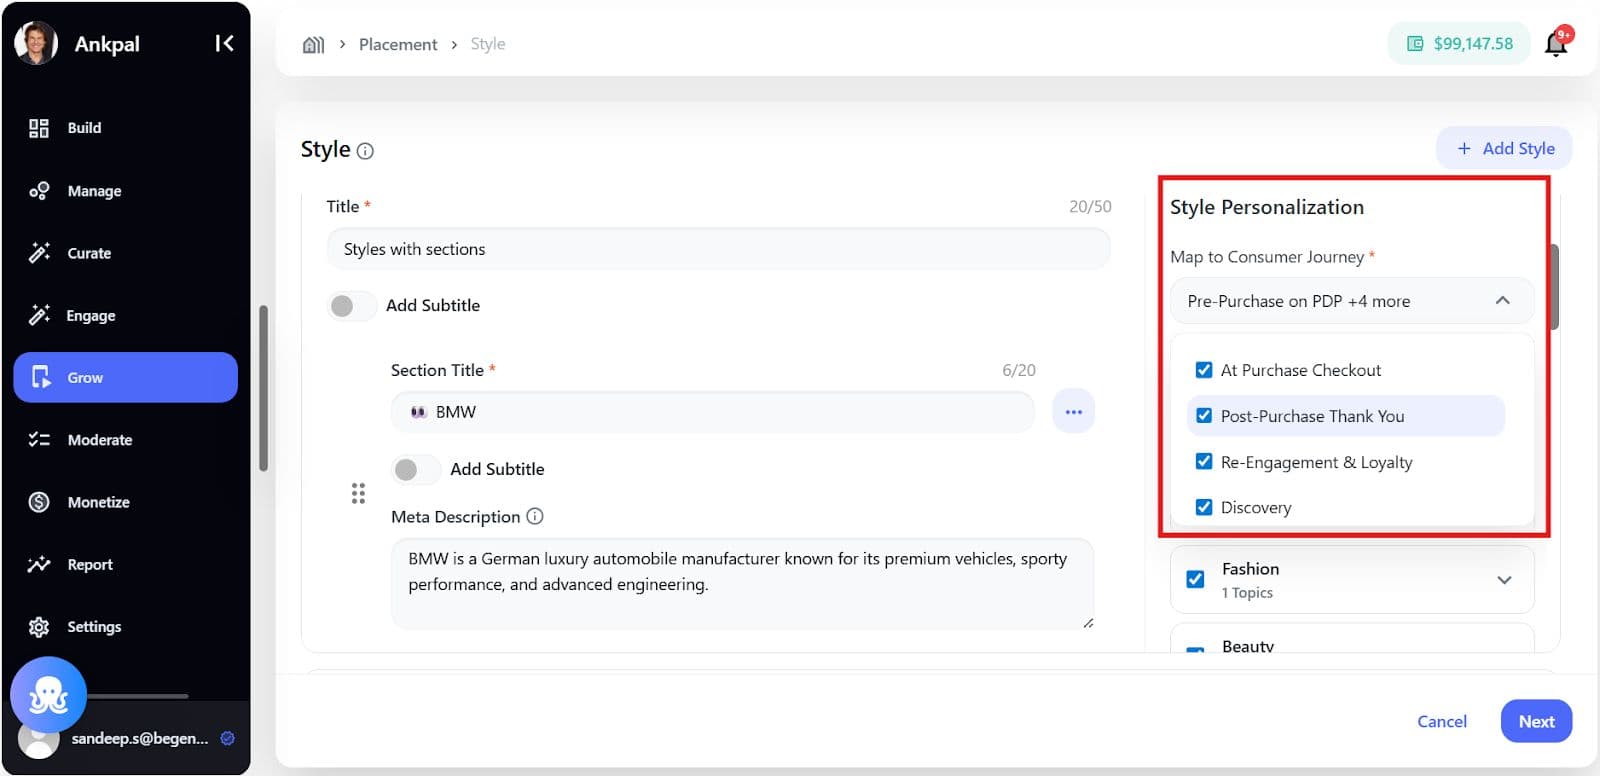
Step 4: Personalize Content Mapping
On the right panel, refine how content appears using personalization options.
Personalization Options
- Consumer Journeys - to maximize visibility, sales, and Customer Lifetime Value (CLV) (for analytics & reporting)
- Pre-Purchase (research and consideration)
- Post-Purchase ((immediate engagement after sale)
- Discovery (brand introduction)
- Loyalty (retention and advocacy)
- Categories, Topics & Keywords
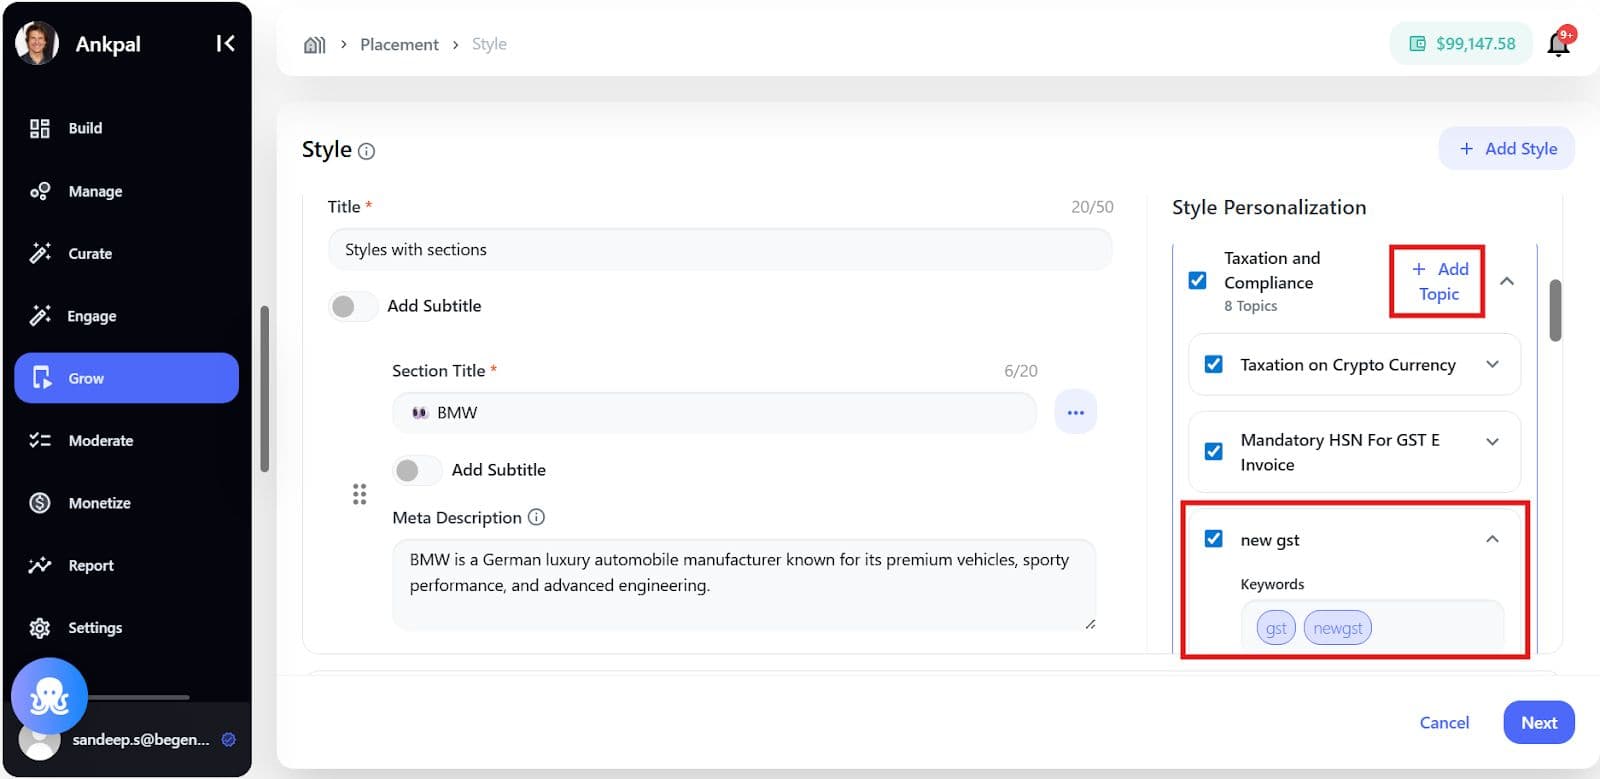
- Content Restrictions
- Show only pinned videos
- Show videos with same page link-out
- Show videos from same brand
- Use recommendation engine videos
Content Mapping Rules
- Each video appears in only one best-matched section
- No duplicate product/link-out videos

Step 5: Save Styles and Configure Placement
Click Next to move to Placement Configuration.
Placement Configuration Includes
- Placement Name (mandatory) - unique identifier
- The Brand Control Center (BCC) uses Layout Types to define how product placements are displayed to shoppers, impacting the user experience and merchandising strategy.
- Grid: A classic, uniform matrix of rows and columns.
- Best For: Displaying broad categories, ensuring visual hierarchy, and facilitating quick comparison.
- Carousel: A dynamic, horizontal scrolling component for a limited set of items.
- Best For: Highlighting trending items, new arrivals, or promotions in a constrained space.
- Feed: A continuously scrolling, vertical list of content/product items.
- Best For: Creating an immersive, discovery-focused shopping experience with rich content blocks and a deep catalog.
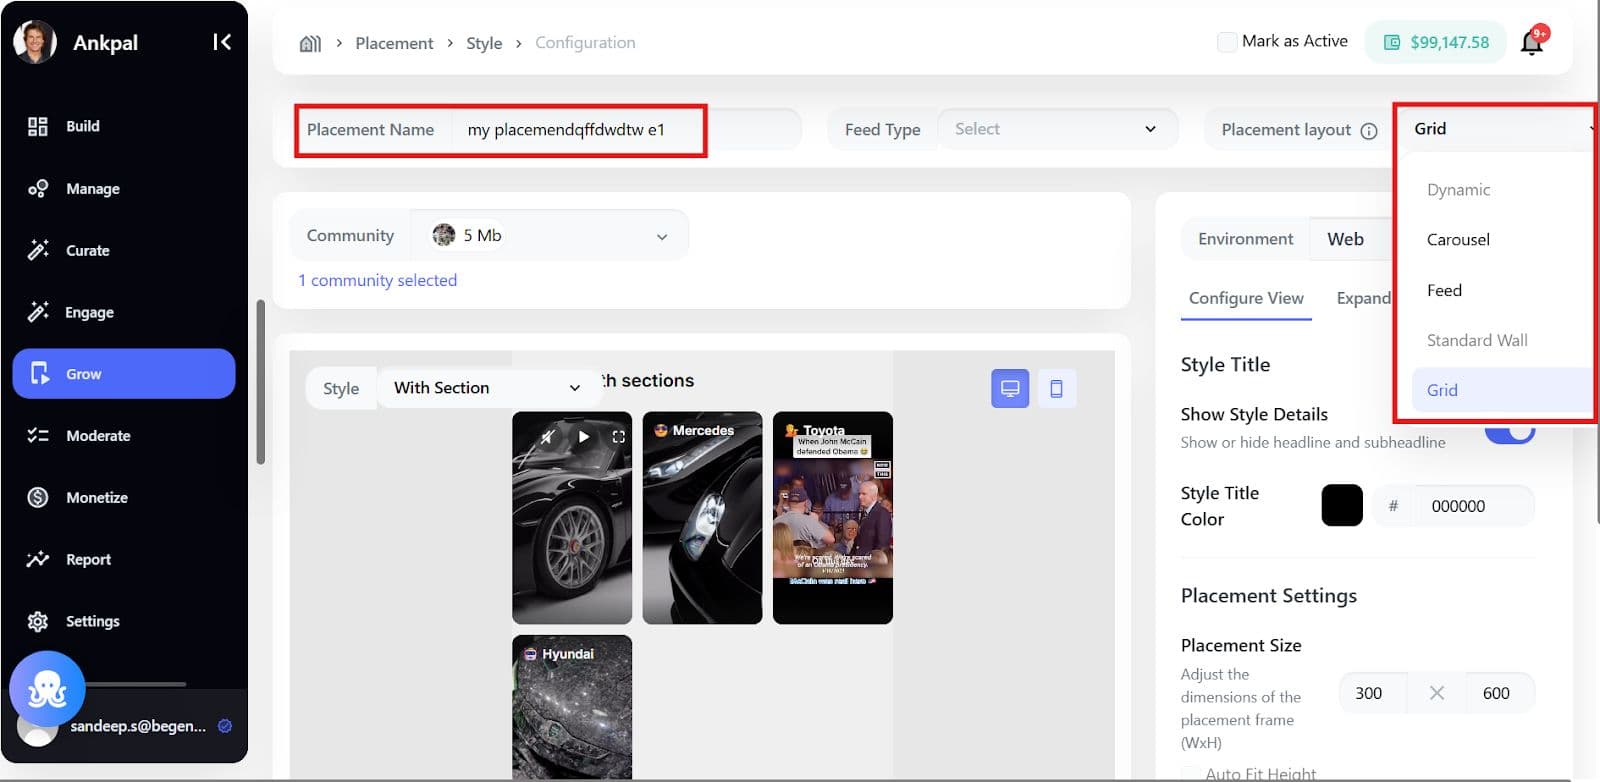
- Feed Type, determines where branded content appears and who sees it. The three options are:
- Brand Feed: Targets your brand's primary feed, ideal for high-impact visibility, major announcements, and direct communication to followers.
- Community Feed: Targets broader communities or interest groups, used for expanding reach, driving consideration, and integrating into topical discussions.
- Group Feed: Targets closed, specialized groups, enabling highly targeted, contextually relevant messaging for dedicated segments (e.g., collecting feedback, exclusive offers).
The Feed Type is the foundational decision for the entire placement strategy.

- Environment: Global or Custom (Web or App)

- Active Status toggle - to control immediate visibility
A live preview is shown for desktop and mobile to validate layout and styling.

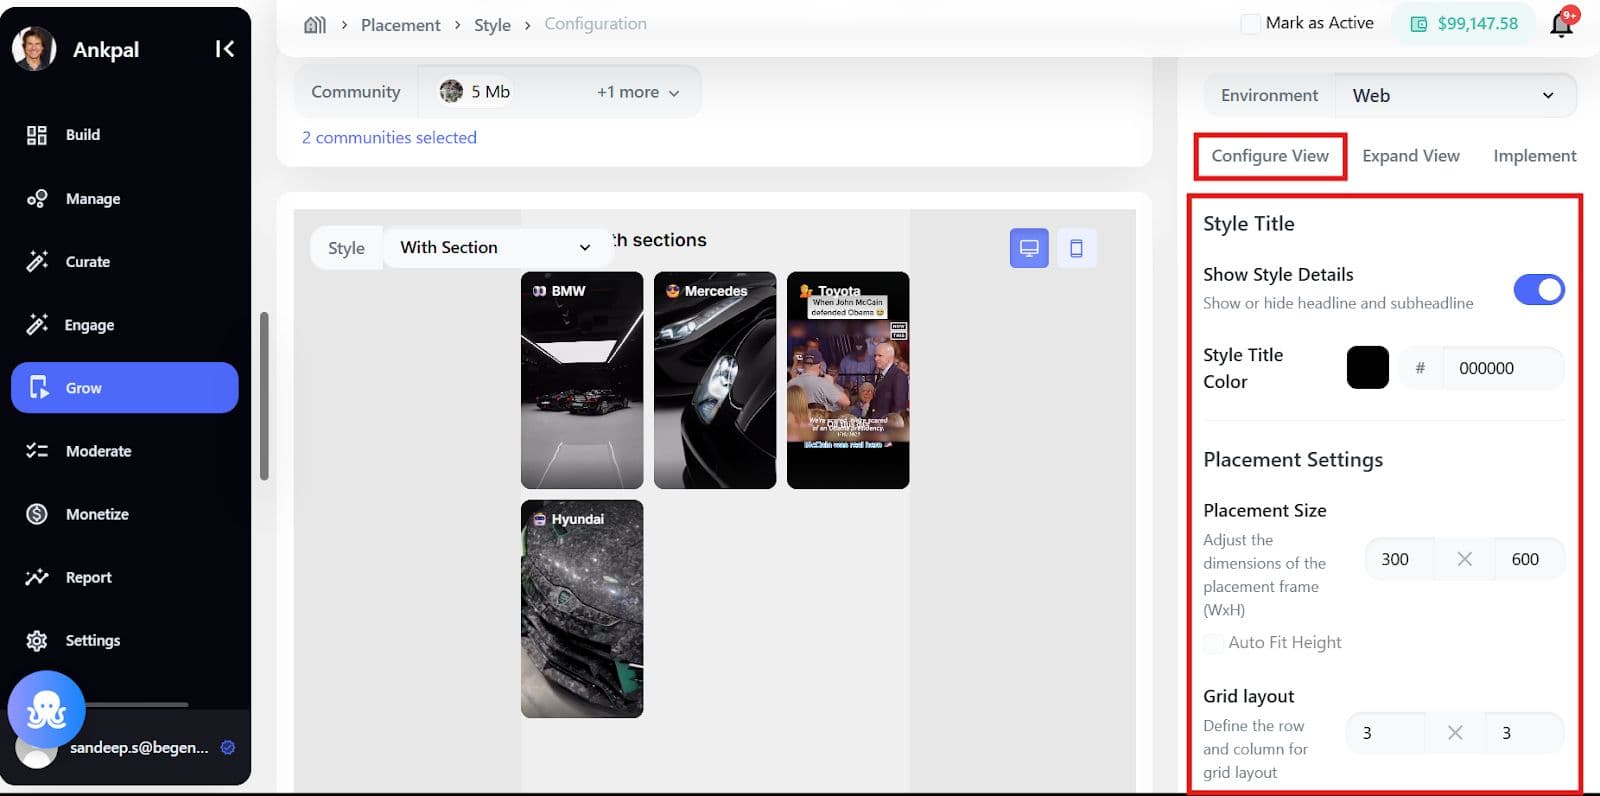
Step 6: Preview and Validate
Use the preview window to:
- Switch between styles
- Check section layouts
- Validate grid/feed/carousel behavior
Preview does not affect live configuration, it’s only for validation.

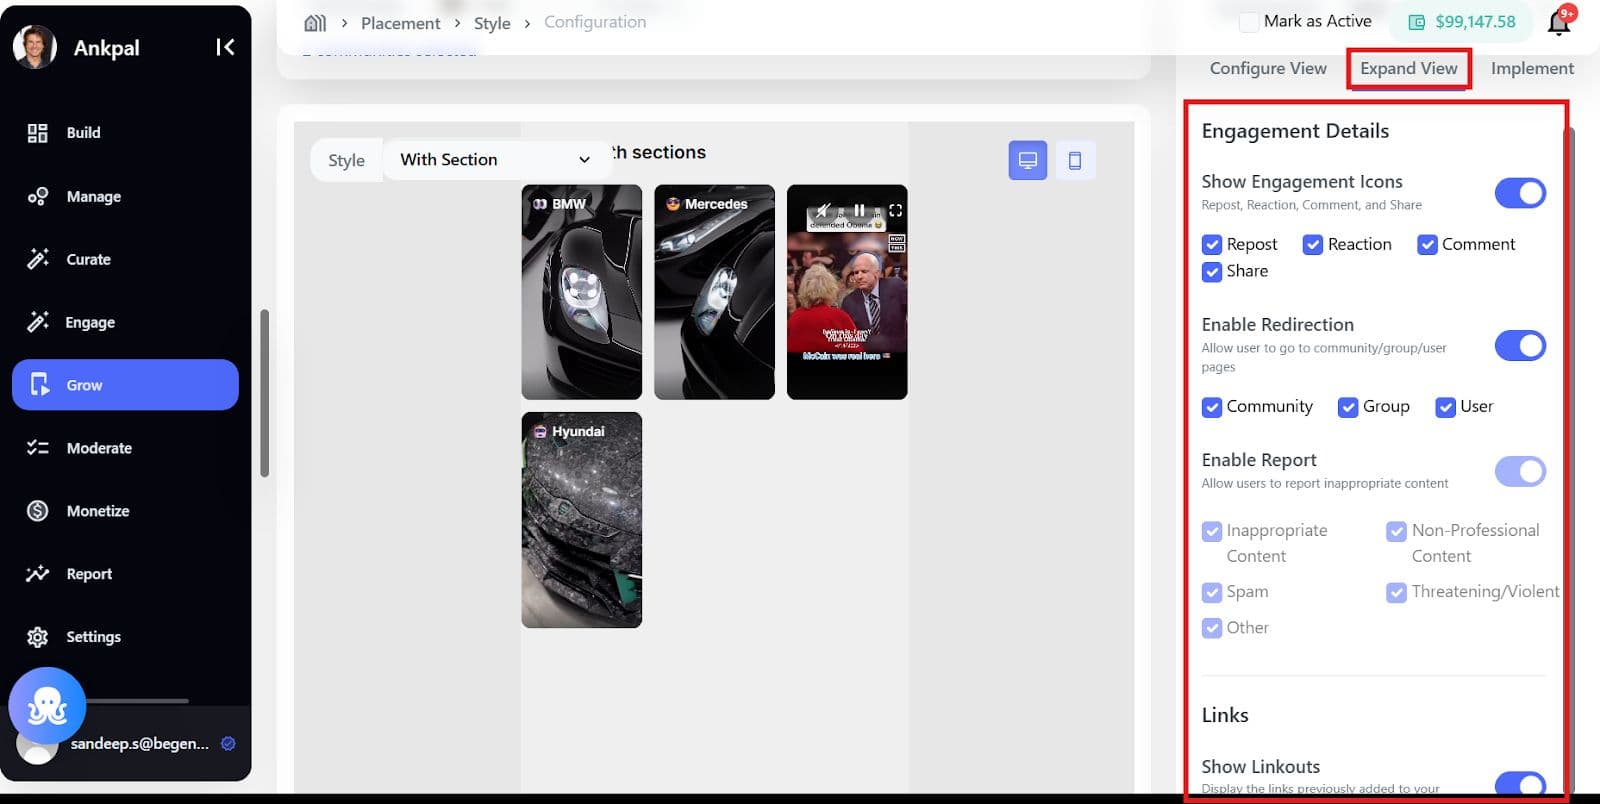
Step 7: Expand View
Engagement Details
- Show Engagement Icons: Includes Repost, Reaction, Share, and Comment.
- Enable Redirection: Allows users to navigate to community, group, or user pages.
- Enable Report: Allows users to report inappropriate content, categorized as:
- Inappropriate Content
- Non-Professional Content
- Spam
- Threatening/Violent
- Other
Links
- Show Linkouts: Displays links previously added to your videos.
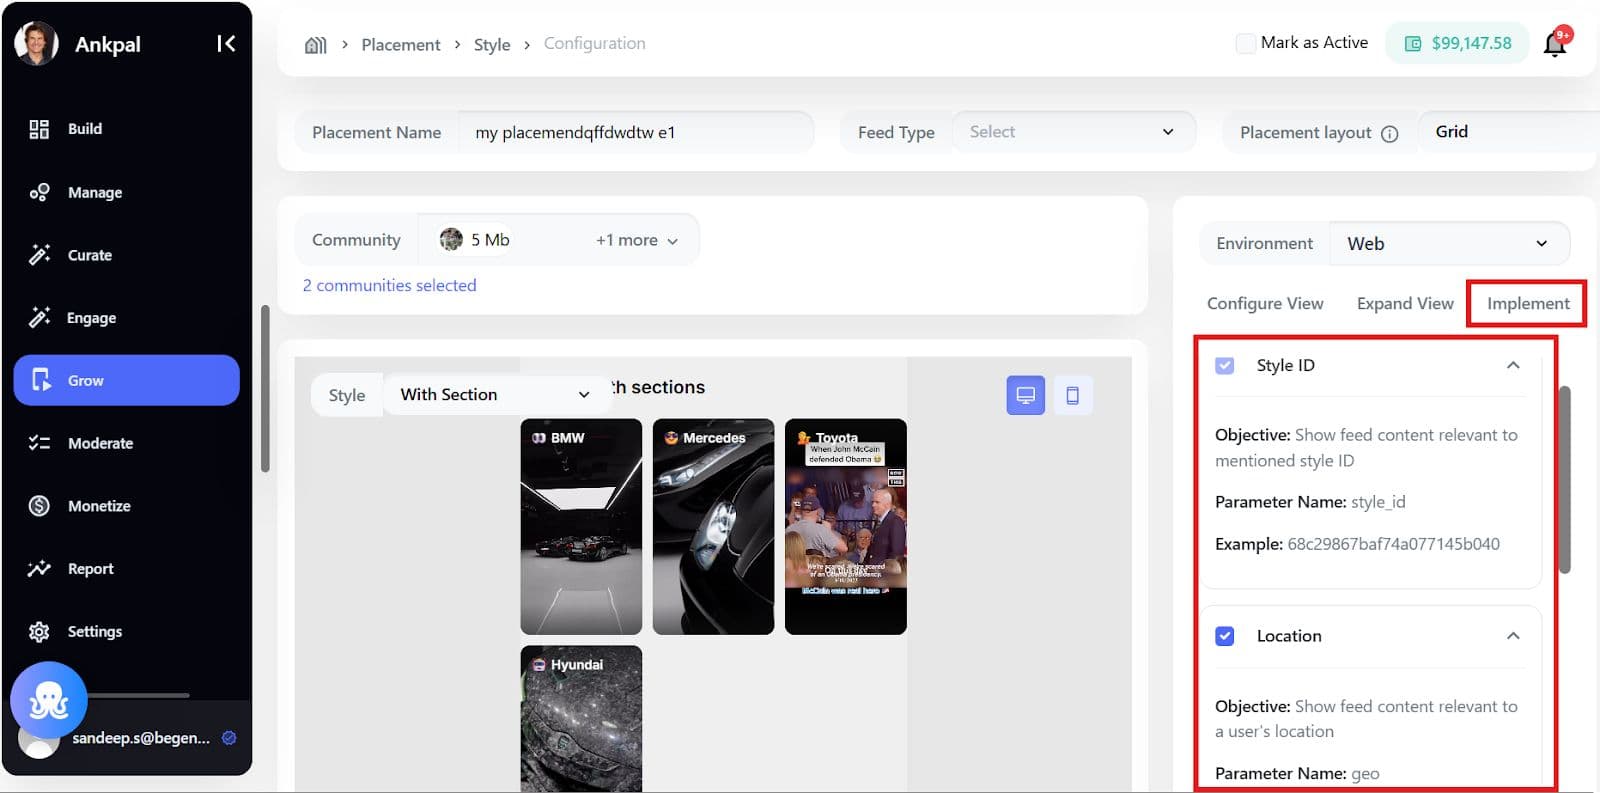
Step 8: Implement the Placement
The Implementation tab provides the essential configuration elements for getting started:
- Mandatory Placement ID
- Ready-to-use Code Snippets
- Feed Personalization Parameters
These Feed Personalization Parameters are crucial for refining the feed content and should be passed as part of your placement configuration. They enable you to leverage real-time context for content relevance.
Examples of Feed Personalization Parameters include:
- style_id: Objective: Show feed content relevant to the mentioned style ID.
- Location-based: e.g., geo
- Context/Place-based:
- Time-based:
- User segment
- Product details, etc..
Specs & Limitations
Supported Layouts
- Grid Configuration: Maximum 3x3 layout.
- Placement Dimensions: Select the placement size, with an option for Auto-fit Height.
- Style Selection: Choose the Style Title Color.
Placement Flow with Variables (Generative Placements)
Placements also support variable-driven (generative) styles and sections, allowing brands to reuse the same placement while dynamically updating content based on values passed at implementation time.
This is ideal for use cases like podcasts, episodic content, shows, campaigns, or dynamically changing categories.
How Variables Work in Placements
Variables act as placeholders inside styles and sections. Their actual values are passed later during implementation.
Example
- Variable label shown in BCC: Podcast Name
- System macro used in implementation: @podcast_name / {{podcast_name}}
The label helps brand users understand what the variable represents, while the macro ensures consistent technical mapping.
Step-by-Step: Creating a Placement with Variables
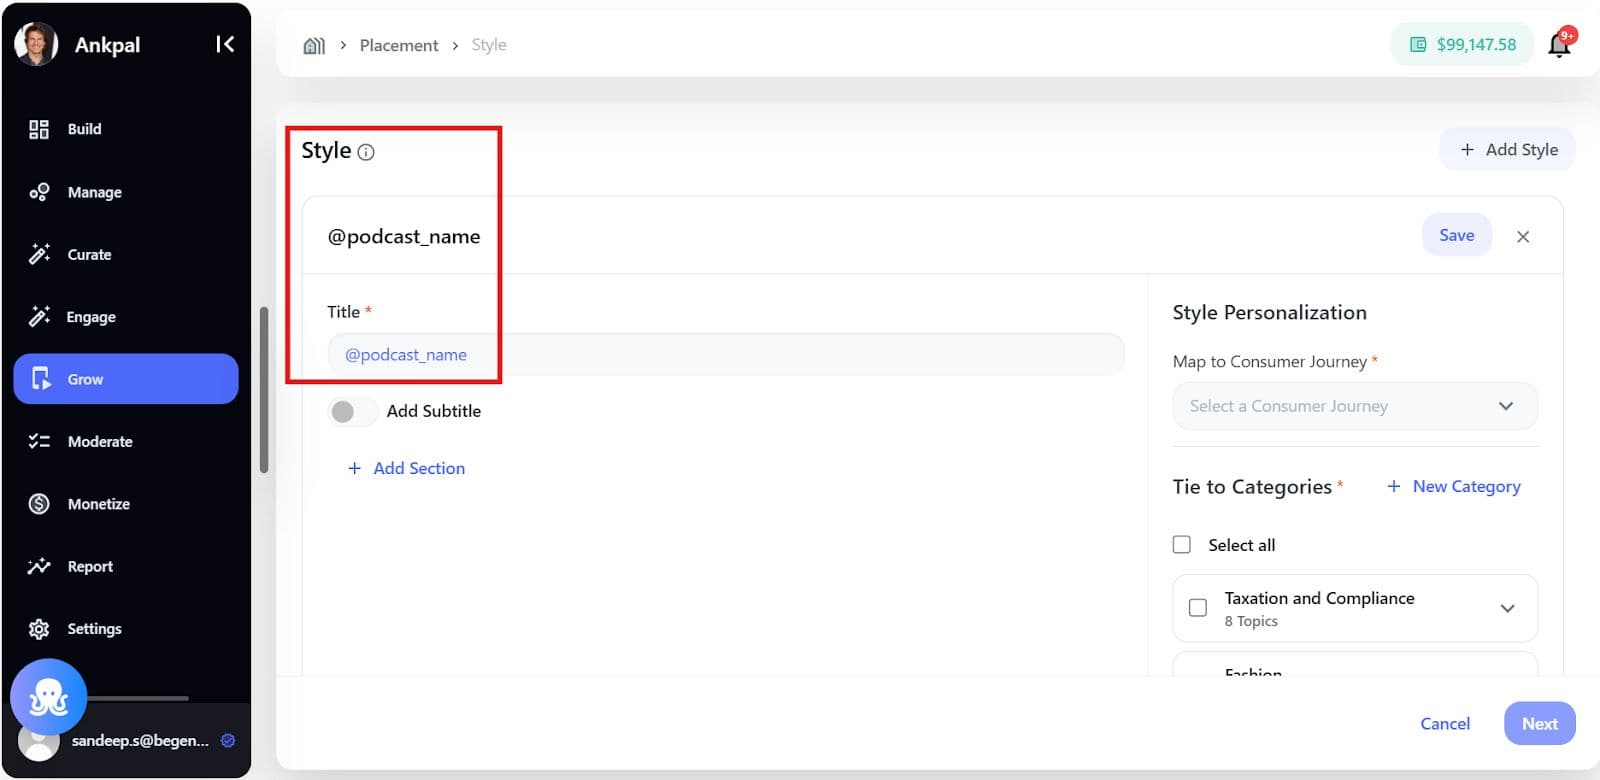
Step 1: Create a Placement and Style (Manual)
- Go to Grow > Onsite > Placements > Create Placement
- Start creating a Style
- In the Style Title field, type @ to trigger the variable dropdown
A dropdown appears showing:
- Default variables (system-provided)
- Previously created custom variables
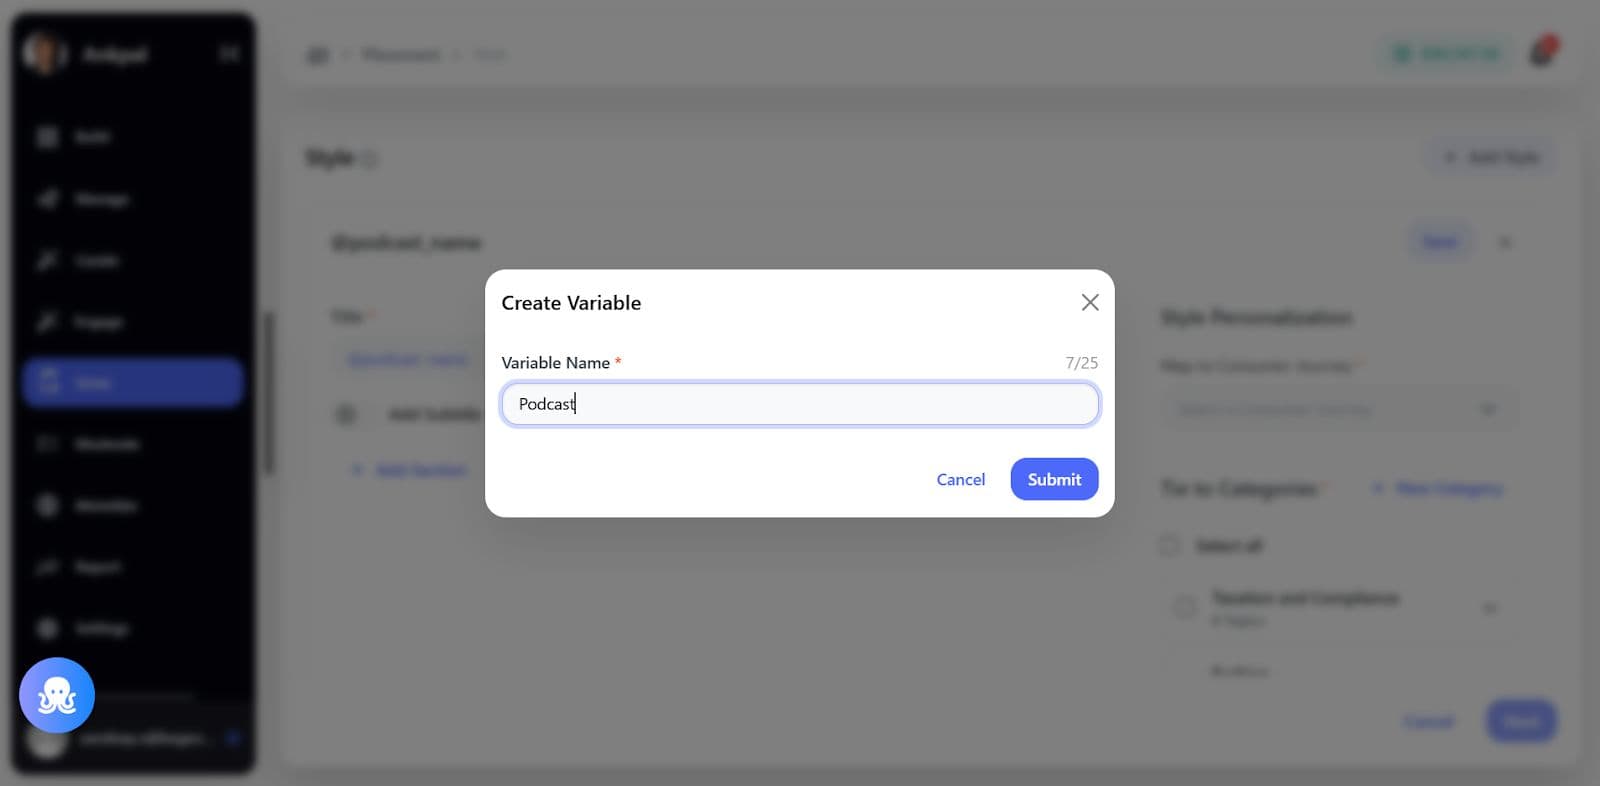
Step 2: Add a Custom Variable
If the required variable doesn’t exist:
- Type @podcast_name (example)
- Press enter to create it
Rules
- Variable name limit: 25 characters
- Underscore (_) is allowed; spaces are not
- Once added, the variable becomes available across styles and sections
The variable will now appear as:
- Podcast Name (readable label) in BCC
- @podcast_name in Implementation Guide
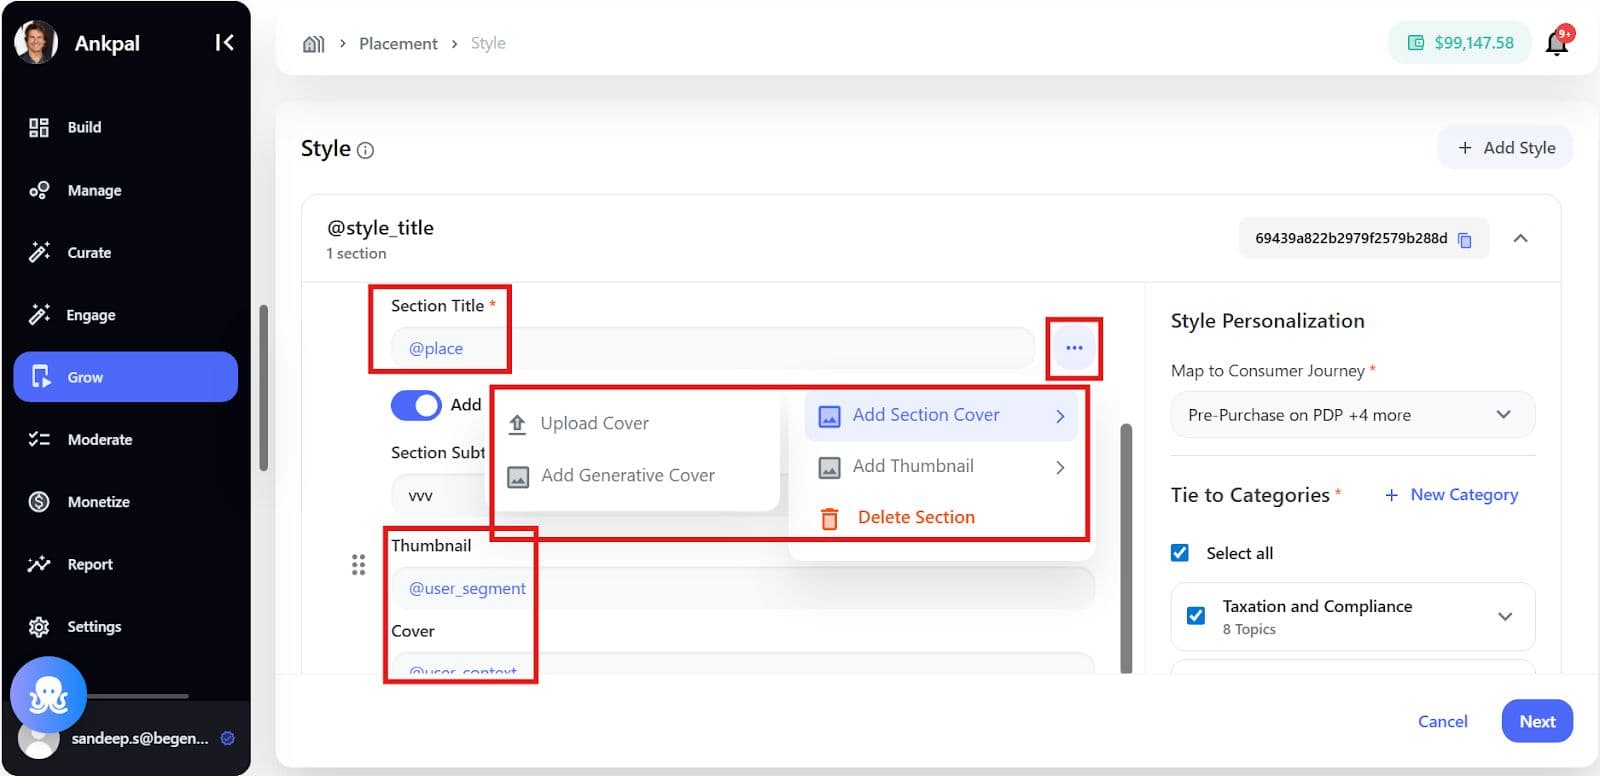
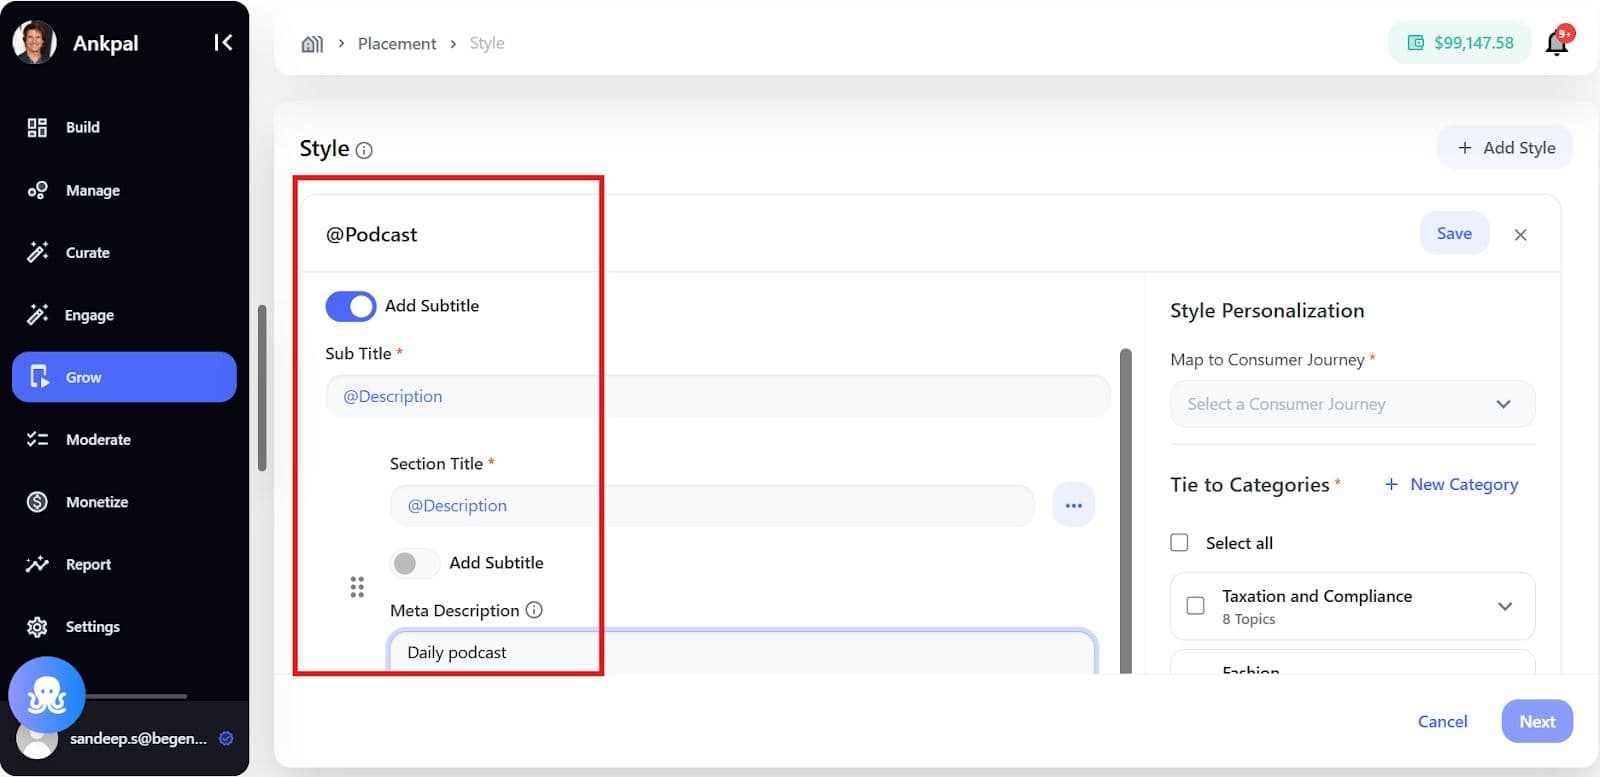
Step 3: Add a Generative Section
- Click Add Section
- Add Section Title using a variable (e.g., @podcast_name)
Important Rule If a variable is used in any section:
- Only one section is allowed under that style
- This section becomes a generative section
The UI will automatically restrict adding more sections.
Step 4: Configure Section Details (Manual)
For the generative section, configure:
- Section Subtitle (optional, can use variables)
- Meta Description Used to improve contextual understanding and content generation
- Thumbnail
- Upload static thumbnail, or
- Add a generative thumbnail using variables
Step 5: Add Section Cover (Optional)
- Open Section Cover dropdown
- Choose:
- Upload Cover (static), or
- Add Generative Cover (using variables)
If no sections are used, the existing section selection dropdown remains unchanged.
Step 6: Preview and Environment Configuration
- Switch between Web / App environments
- Preview updates automatically using default variable values
- Only one section preview is shown for generative placements
Step 7: Implementation Guide – Variable Mapping
In the Implementation Guide:
- All variables used in the style and section are listed
- Each variable shows:
- Variable name
- Usage count
Example Mapping
{
"podcast_name": "The Growth Show"
}
Here:
- Podcast Name is what the brand sees in BCC
- @podcast_name / {{podcast_name}} is what developers pass during implementation
This ensures clean separation between business-friendly UI and technical integration.
What the End User Sees in the Placement
The expanded view follows the same configuration rules defined in customization settings.
Rules & Constraints
- All videos maintain 9:16 aspect ratio
- Sections are optional but limited to 10 per style
- Placement analytics mirror Embed analytics
- Dynamic & Standard Wall layouts are not enabled in Phase 1
Generative Placements
- Supports dynamic sections using variables (e.g., @location, @brand_id)
- Only one generative style and one generative section per placement
- Static and variable text cannot be mixed
Related Article
- What are the different user experiences?
- What is a Consumer Media Network?
- How can media brands get started with Brand Control Center to launch or amplify their media network?
- What criteria does the AI use to select and recommend content in communities and groups?
- How to Add or Curate Content in AI-Generated Communities or Groups in Brand Control Centre
